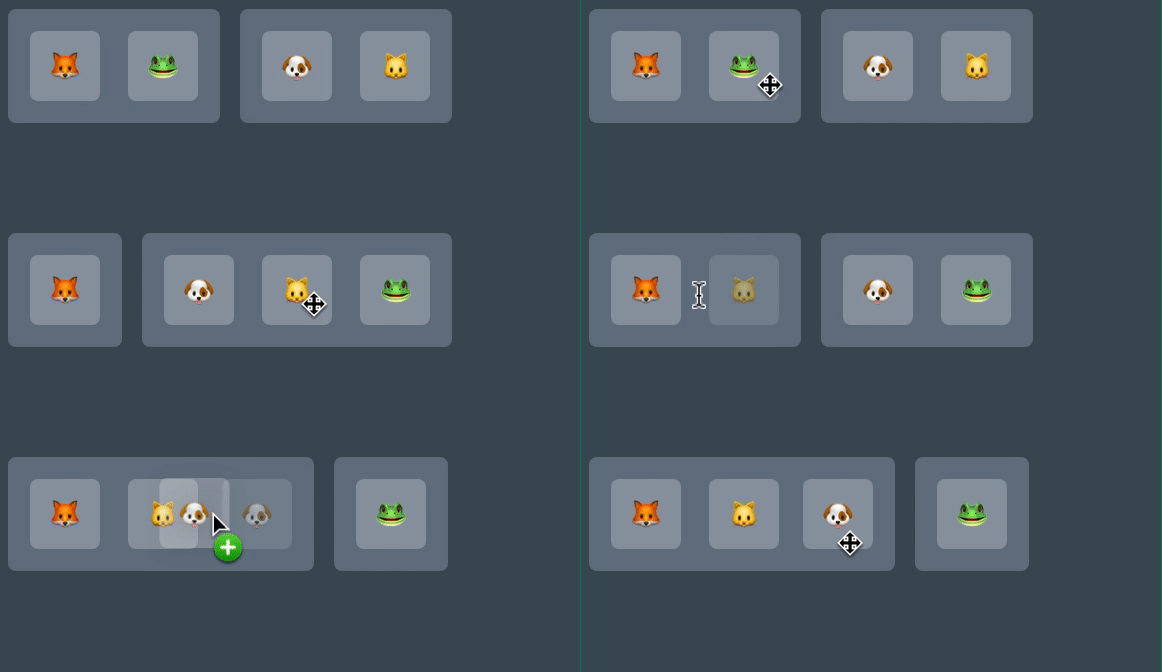
이번 포스팅에서는 JavaScript를 사용해 아래와 같은 드래그 앤 드롭을 구현해 볼 것이다.

드래그 앤 드롭을 구현할 때는 draggable 속성과 dragstart, dragend 이벤트를 사용한다. draggable 속성은 Boolean 값이며 true일 경우 요소를 드래그 할 수 있다.
먼저 기본 html과 css이다.
<body>
  <div class="container">
    <button class="draggable" draggable="true">🦊</button>
    <button class="draggable" draggable="true">🐸</button>
  </div>
  <div class="container">
    <button class="draggable" draggable="true">🐶</button>
    <button class="draggable" draggable="true">🐱</button>
  </div>
  <script src="main.js"></script>
</body>
body {
  margin: 0;
  padding: 0;
  background-color: #3d4e56fa;
  display: flex;
}

button {
  width: 70px;
  height: 70px;
  border: none;
  border-radius: 8px;
  margin: 12px;
  cursor: move;
  font-size: 30px;
  background: #eaeaea4f;
}

.container {
  margin: 10px;
  padding: 10px;
  background-color: #b5c1dc57;
  border-radius: 8px;
}

.draggable.dragging {
  opacity: 0.5;
}
처음에는 두 개의 container에 버튼이 각각 두 개씩 있다. 버튼의 개수는 물론, container의 개수는 상관이 없다. 드래그 할 요소인 버튼이 어떤 container에 들어가는지 계속해서 확인해 줄 것이기 때문에 container는 1개로 해도 되고 10개로 해도 괜찮다.
그리고 기본적인 스타일을 해준다. cursor에 move라는 값을 주면 해당 요소가 드래그 될 수 있다고 표시를 해준다. 그리고 현재 드래그 하고 있는 요소를 나타내기 위해 opacity 설정을 해주자.
다음은 이제 각 요소와 컨테이너에 이벤트 리스너를 달아줄 차례이다.
const draggables = document.querySelectorAll(".draggable");
const containers = document.querySelectorAll(".container");

draggables.forEach(draggable => {
  draggable.addEventListener("dragstart", () => {
    draggable.classList.add("dragging");
  });

  draggable.addEventListener("dragend", () => {
    draggable.classList.remove("dragging");
  });
});

containers.forEach(container => {
  container.addEventListener("dragover", e => {
    e.preventDefault();
    const draggable = document.querySelector(".dragging");
    container.appendChild(draggable);
  });
});
각 버튼에는 dragstart와 dragend를 달아주고, 드래그가 시작되면 해당 요소에 dragging이라는 클래스명을 추가시키고 끝나면 삭제한다. 컨테이너에는 dragover이벤트를 달아주고, 드래그하고 있는 요소가 해당 컨테이너 위에 있을 경우 자식으로 이어 붙인다.
여기까지 했으면 다음과 같이 동작할 것이다.

이제 구현해야 할 것이 드래그하는 요소가 다른 요소 사이에 들어가는 것이다. getDragAfterElement라는 함수를 만들 것이다.
function getDragAfterElement(container, x) {
  const draggableElements = [
    ...container.querySelectorAll(".draggable:not(.dragging)"),
  ];

  return draggableElements.reduce(
    (closest, child) => {
      const box = child.getBoundingClientRect();
      const offset = x - box.left - box.width / 2;
      // console.log(offset);
      if (offset < 0 && offset > closest.offset) {
        return { offset: offset, element: child };
      } else {
        return closest;
      }
    },
    { offset: Number.NEGATIVE_INFINITY },
  ).element;
}
다른 요소 사이에 들어가기 위해서는 다른 요소들과 현재 드래그 하고 있는 요소의 상대적 위치를 알아야 한다. 그게 바로 위에서 offset이다. draggableElements에 컨테이너에서 드래그 하고 있지 않은 요소들을 담는다. 그리고 그 요소들의 offset를 통해 드래그 하고 있는 요소가 어떤 요소 앞에 들어가야 하는지 알려줄 것이다.
box에는 getBoundingClientRect값으로 각 요소의 위치 값이나, height, width 값들이 들어가있다.

이 box의 left와 width, 드래그 하고 있는 요소의 X값을 비교하여 offset값을 도출해낼 수 있다. 실제로 offset값을 찍어보면 드래그를 하고 있는 요소가 box의 가운데를 기준으로 왼쪽에 있으면 음수 값, 오른쪽에 있으면 양수 값을 가지게 된다.
우리는 드래그를 통해 놓을 위치의 오른쪽 요소만 알아내면 된다. 즉, offset 값이 음수를 갖게 되면 된다. 그리고 closest를 통해 어디에 더 가까운지 알아낼 수 있게 된다.
그리고 getDragAfterElement에서 반환된 element는 컨테이너의 이벤트 리스너에서 받아와 남은 작업들을 처리한다.
containers.forEach(container => {
  container.addEventListener("dragover", e => {
    e.preventDefault();
    const afterElement = getDragAfterElement(container, e.clientX);
    console.log(afterElement)
    const draggable = document.querySelector(".dragging");
    container.appendChild(draggable);
  });
});
요소들을 드래그하면서 afterElement를 보면 현재 위치에서 가장 가까운 오른쪽 요소를 나타내는 것을 알 수 있다. 드래그 하고 있는 요소가 가장 오른쪽에 있을 경우(오른쪽에 다른 요소가 없을 경우)에는 element 프로퍼티가 없기 때문에 undefined일 것이다. 따라서 다음과 같이 해줄 수 있다.
containers.forEach(container => {
  container.addEventListener("dragover", e => {
    e.preventDefault();
    const afterElement = getDragAfterElement(container, e.clientX);
    const draggable = document.querySelector(".dragging");
    if (afterElement === undefined) {
      container.appendChild(draggable);
    } else {
      container.insertBefore(draggable, afterElement);
    }
  });
});
가장 오른쪽에 있을 경우(마지막 순서일 경우) appendChild로 마지막에 이어 붙이고, 아닐 경우 afterElement가 가리키는 요소 앞에 삽입한다.
참고
'JavaScript' 카테고리의 다른 글
| 자바스크립트 코드를 더 깔끔하고 보기 좋게 작성하는 팁 (3) | 2021.08.10 |
|---|---|
| [JavaScript] 이벤트 버블링, 이벤트 캡처링과 이벤트 위임 (0) | 2021.03.31 |
| [JavaScript] 비동기 처리의 꽃 async와 await (0) | 2020.11.10 |
| [JavaScript] 비동기 처리를 위한 Promise (0) | 2020.11.10 |
| [JavaScript] 부분 문자열 추출하는 방법 (0) | 2020.10.27 |

